How to Monetize Your Open Source Project and Stay Alive

Chen Ravid is a free software enthusiast and serial entrepreneur. He is one of the founding members and VP product at xs:code, a monetization platform for open source projects.
 xs:code, a monetization platform for open source projects.

Why Monetize?

Open-source developers are not in it for the money. They create amazing software projects we all use every day, spending hundreds, if not thousands of hours of their spare time in the process. The reward? Recognition, a sense of accomplishment and bragging rights on their next job interview. This was enough for most developers for a long time, but in the past couple of years, and as commercial usage of open-source increased, we’ve seen growing frustration among developers, who are flooded by requests, bugs and questions – from people using their code for free. Some developers even got threats (!) from disgruntled users, demanding the developers fix a bug or implement a new feature they needed.

This frustration is increased, when developers see their open source projects are used to generate revenue for companies, while they are getting nothing for their talent, work and efforts. It seems unfair, and rightfully so. Developers need a way of getting the resources they need, to keep developing their projects. They need to be able to afford the time to work on their projects, get hosting servers, pay others to help out and more. Without any form of compensation from the people using their code – that is just not sustainable in the long run. So, the goal is not to get rich. The goal is getting the resources to build better software. Monetization is the way to achieve that goal.

The Challenges

Monetization is something that is usually out of the scope of what developers are interested in, and usually requires dealing with non-programming tasks such as setting up billing, handling payment processing and taxes, addressing legal issues and more. Because of the complexity involved, a lot of developers just give up before even trying. They don’t want to worry about financials and other corporate nightmares. They want to write code – not run a software company.

Besides the complexities of charging users for using their code, there are other aspects that make things even more complicated – how do you incentivize your users to pay while keeping your code open source? How do deal with other developers who contributed code to your project? Should they be compensated as well?

It’s a complicated task, and there are not a lot of easy solutions.

Why Not Use Donations?

To meet the monetization challenges, several donation platforms have emerged, offering developers to ask for donations from users using their code. That seems like the proper thing to do. If you are using a project for free and make money using it, you should be happy to donate to its creator, right? The reality is, unfortunately, that the overwhelming majority of companies using open source, do not donate at all. Because of the inherent nature of donations, being non-mandatory, no one has a strong incentive to donate, let alone on an ongoing basis. This makes donations a very limited way of monetizing, and many developers who tried it report that their revenue from donations is marginal, if not zero. Donations are an all-carrot-no-stick approach, and if developers need a steady stream of revenue to afford to make their projects better – they need something they can rely on. They need a stick to go with their carrot.

A New Way to Monetize

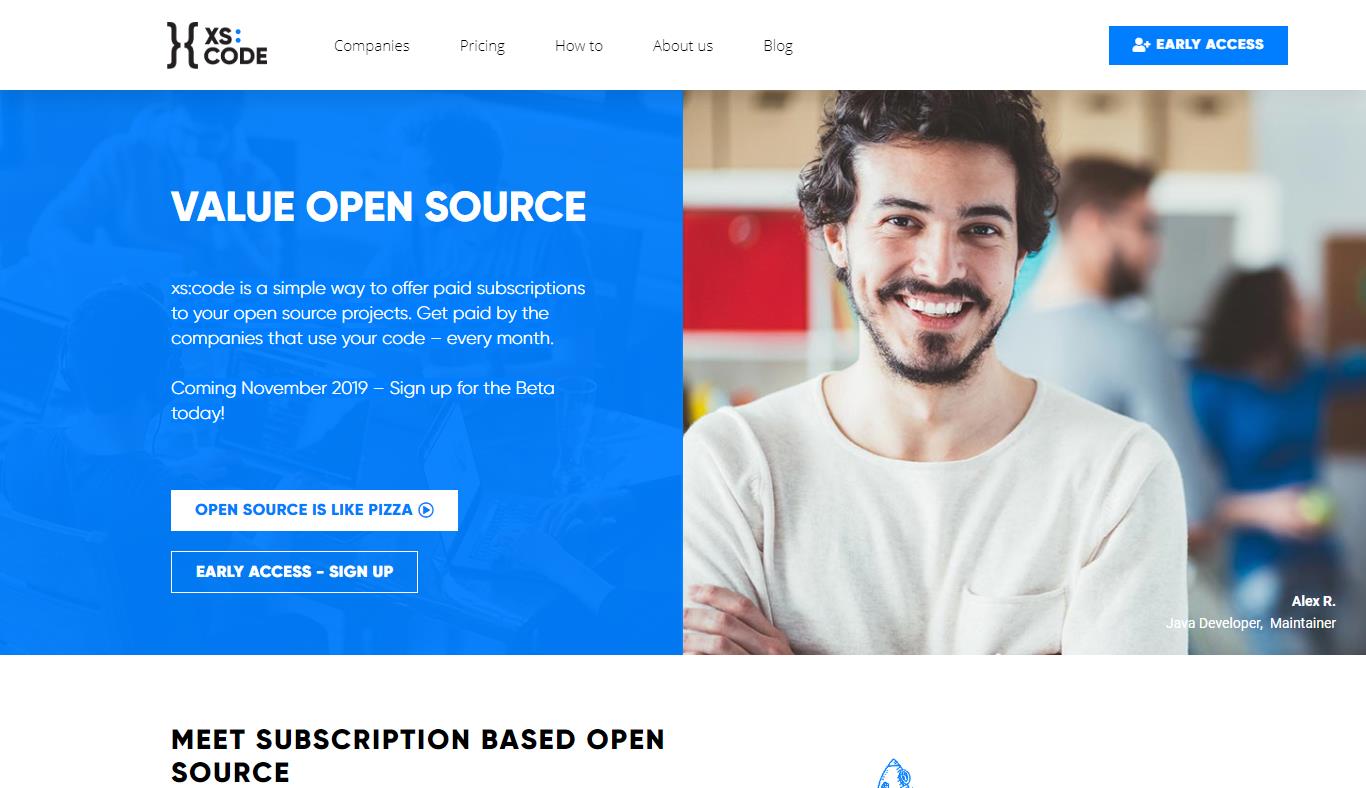
To overcome the barriers mentioned above, we at xs:code came up with a solution, that we believe can help make monetization so simple, that any open-source developer can start doing it today. xs:code is a platform that allows developers to offer subscription-based access to a private repository the keep on their Github account. Usually, open-source projects are kept in a public repository, freely accessible by anyone.

Our platform allows developers to keep another version of their project, that is connected to xs:code, and accessible only for users who pay for a subscription. The developer can decide how the two versions are different, and keep developing on Github as usual. The platform handles everything from billing, payment processing, invoicing and legal. The trick here is to make a smart decision on how the paid and free versions differ, so users have an incentive to pay. There are several options to do that, each with its own advantages.

Dual Licensing vs. Freemium

One option is often referred to as “dual licensing”. The developer keeps a version with a copyleft license (such as GPL) on his public Github repository, and the exact same code, with a permissive license (such as MIT), on his private repository. GPL licensed code, usually means the code cannot be used in commercial software, as it requires to change the entire code around it to GPL as well. That means companies using the open-source code will need to make their entire code base open source, and that is usually not viable most companies. MIT licensed code, can be used freely, no restrictions apply. If a company wants to use an open-source project with an MIT license, they would need to buy a subscription on xs:code.

Another option, usually called “freemium” or “Open core”, means that the developer keeps a “Lite” version on his Public repository, and another “Pro” or “Premium” version on his private repository. The “Pro” version can have more features, better support, paid hosting, or whatever the developer wants to offer.

There are many other options to separate the paid and free versions, and developers are only limited by their imagination and creativity to come up with ways to offer value to their brand new paying customers.

Paying Contributors

Code contributions are one of the key elements that made open source so incredible. When developers from all over the world contribute their time and talent to help make projects better – we all win. When the developer of a project starts to generate revenue from his code, it only makes sense the developers who contributed would also be entitled to their fair share. xs:code makes that simple, by allowing developers to grant contributors a percentage of their revenue. We see this as not only fair, but essential for keeping contributors motivated, and offering new contributors an opportunity to benefit from helping with making a project better.

Conclusion

Open source is an incredible thing. But without proper compensation for developers and contributors, it might not last – and that is bad for everyone involved in software development. In order to keep open source alive, a clear path of compensation for developers is crucial. I truly hope that our humble contribution to this cause would help make open source better – for all of us.

Interested in monetizing your project? Visit xscode.com

7 Best Notepad++ Alternatives

Notepad is among the most popular applications, and that is why Microsoft has included it in every version of Windows. It has a long history, and it has maintained a simple and clean interface. The simplicity of this text editor I use, and that is why most people have developed a preference over it. But wait? The developers keep on making improvements to suit your needs.

There is another text editor outside notepad, which is notepad ++. It has a bunch of features that allow you to complete more complex tasks. It has syntax folding, syntax highlighting when writing code and multi editing. Once you are in a good position to use notepad++ you will need WinRAR to help you compress storage required to store data by removing unnecessary data to pave the way for what you want to save. You can simply get it at rocketfiles.com​.

Therefore with such an amazing text editor, you will not miss having its alternatives, and that is why in this article I will focus on its alternatives.

7 Best Notepad++ Alternatives

1. Brackets

his is a typical Text editor that offers unique tools for front end web developers and designers. It offers the following features:-

Features

  1. It has support for an extension
  2. It offers a live preview, which implies you can edit the code using the editors and as well preview it in the browser within the editor.
  3. It offers inbuilt supports for SCSS
  4. It autocompletes texts
  5. It has syntax highlighting
  6. It can automatically identify a code

Pros

  1. Easy to install and use
  2. It is an open-source
  3. You can add your plugins
  4. You can use it without additional cost

Cons

It offers less support for back end developers.

2. Sublime Text

It is among the popular text editor across all the platforms since it is capable of supporting various programming languages. It is highly responsive such that it automatically resizes tab size when you open multiple tabs.

Features

  1. It offers complete keyboard support
  2. It is an open-source
  3. It is not mandatory to purchase the license
  4. No costs during installation

Pros

  1. It has auto-indentation feature
  2. It is easy to install and use
  3. It has intelligence sense features

Cons

It lacks git plugins.

3. Atom

It is a free open source editor with lots of features. It is compatible with Linux, Windows, and Mac OS.

Features

  1. It can autocomplete texts
  2. It automatically identifies codes
  3. It provides syntax highlighting

Pros

  1. It is easy to install
  2. Free, open-source editor
  3. It offers several plugins to enhance its reflectiveness
  4. It has an elegant interface

Cons

  1. It is a bit slower when you compare to the other editors
  2. It is large in size

4. Visual Studio Code

This is also another popular text editor that can support multiple programming languages. It is compatible with various operating systems, and it offers competent community support.

Features

  1. It has an inbuilt feature which is done signed for file comparison
  2. It is an open-source editor
  3. It offers an inbuilt Git support
  4. It can be installed across multiple operating systems
  5. It supports user commands

Pros

  1. It is easily customizable
  2. It is light in weight

5. Netbeans

This is yet another text editor that is majorly used for Java development. It is an Integrated Development Environment that is based on the concept of modularity.

Features

  1. It can autocomplete various texts
  2. It automatically detects the codes
  3. It has syntax highlighting features

Pros

  1. It offers easy debugging feature
  2. It is an open-source text editor
  3. It is based on the modular concept
  4. It is an ant-based project system
  5. It can support maven

Cons

  1. It is heavy
  2. It offers less skin customization

6. TextMate

This is a typical text editor, which is an alternative for notepad++, and it can be used for general purposes. Here are some of its dominant features:-

Features

  1. It is customizable
  2. It provides syntax highlighting
  3. It autocompletes texts
  4. It automatically identifies codes

Pros

  1. It has a live preview feature
  2. It can list function in the current document

Cons

It can only be installed in Mac OS.

7. TextPad

This text editor was initially developers to be used in Microsoft OS by Helios Software solution. To be able to use it, you will have to purchase it.

Features

  1. Supports multiple programming languages
  2. It is capable of maintaining block indent
  3. You can scroll multiple files synchronically
  4. It offers automatic code identification
  5. It automatically integrates JDK

Conclusion

Notepad++, which is available and free at rocketfiles.com,  is popular because of its unique features. There are also alternatives that I have listed in this article that can actively perform similar tasks. You can use any of these editors for programming or general purposes. The good thing about most of these text editors is that they are easy to install and use. Most of them are also free except text pad, which you have to purchase it before using it. Generally, most of these text editors can compliment notepad ++ perfectly.

5 Tips to Become a Better Programmer

8 Best Rules for Good Programming Style

ALSO READ: 5 Tips to Become a Better Programmer

Proper programming style significantly reduces maintenance
costs and increases the lifetime and functionality of software. Most software
disasters are rooted in poor style of programming. In this article I am listing
out the 8 best rules that lead to a better programming style.

Readability

Good code is written to be easily understood by colleagues.
It is properly and consistently formatted and uses clear, meaningful names for
functions and variables. Concise and accurate comments describe a natural
decomposition of the software’s functionality into simple and specific
functions. Any tricky sections are clearly noted. It should be easy to see why
the program will work and reason that it should work in all conceivable cases.

Maintainability

Code should be written so that it is straightforward for
another programmer to fix bugs or make changes to its functionality later.
Function should be general and assume as little as possible about preconditions.
All important values should be marked as constants which can be easily changed.
Code should be robust to handle any possible input and produce a reasonable
result without crashing. Clear messages should be output for input which is not
allowed.

Comments

Comments are the first step towards making computer program
human readable. Comments should explain clearly everything about a program
which is not obvious to a peer programmer. The volume of comments written is
meaningless, quality is all that counts.Block comments are written using /* comments */ style. They should go at the top of every source
file and generally include your name, the date your code was written and
overall description of the purpose of that program. Block comments should also
precede most functions with a description of the function’s purpose; these can
be omitted for very short, obvious functions only.Inline comments are written as //comments, they should go near important lines of code within
functions or with variables when they are initialized.

Naming

Names given to classes, variables, and functions should be
unambiguous and descriptive. Other guidelines for naming are:

  • Capitalization is used to separate multi-word names:
    StoneMasonKarel.
  • The first letter of a class name is always capitalized:
    GraphicsProgram
  • The first letter of a function or variable name is always in
    lowercase: setFilled().
  • The names x and y should only be used to describe
    coordinates.
  • The names i, j, and k should only be used as variables in
    for loops.
  • Other one-letter names should be avoided: area = base *
    height instead of a = b * h.
  • Names of constants are capitalized, with underscores to
    separate words: BRICK_COLOR.
  • Use abbreviations with caution. max instead of maximum is
    fine, but xprd instead of crossProduct is a problem.

Indentation

Indentation is used to clearly mark control flow in a
program. Within any bracketed block, all code is indented in one tab. This
includes the class body itself. Each additional for, while, if, or switch
structure introduces a new block which is indented, even if brackets are
omitted for one line statements. For if statements, any corresponding else
statements should line up

White Space

White space is meaningless to compilers, but should be used
consistently to improve readability. Typically three blank lines are left in
between functions. Individual blank lines are used within functions to separate
key sections. Use of spaces varies as well, but inserting one space usually
make expression more readable; next = 7 *
(prev – 1)
 is clear than next=7*(prev-1).

Function Usage

Function should be short and accomplish a clear, specific
task. As much as possible they should be considered “black boxes” which do not
depend on anything except their parameters and can be handle any possible input
gracefully. A common rule of thumb is the “Ten Line Rule”, usually function
longer than ten lines are trying to do too much and should be simplified.Another important aspect of functions is that any repeated
segments of code should be made into a separate function. This will shorten
your program and improve readability.

Output

A final, overlooked aspect of good programming style is how
our program output results and information to users. Part of writing
professional looking programs is providing clear instructions and results to
the users of our programs. This means proper English with no spelling error conditions.
One must always assume that writing programs to be used by somebody with no
understanding of computer programming whatsoever.If you liked the article then please share it!

5 Things You Must Consider Before Using ASP.NET Development

Today’s contemporary web needs expect you to opt for a programming framework that comes loaded with remarkable benefits. Before choosing a particular framework, you must gauge it in terms of ease-of-use and scalability. Amongst the wide range of programming frameworks available in the web market, ASP.NET has been successful in making it to the list of leading web development frameworks used by web developers across the globe. If you too are about to leverage ASP.NET features for building remarkable web solutions then this is a post you can’t afford to miss. Here, I’ve covered five vital things that you must consider before using ASP.NET as your web development tool.

1. High-grade scalability

For being able to make the most of a web development framework, you must ensure that the same is equipped with high-end scalability options. The more scalable the framework is, the better it would be for you (as a developer) to manage the events and sessions across multiple servers used during web development.

If your web programming framework comes with top-level scalability, you can stop worrying about scaling your web application in accordance to forthcoming advancements in the field of technology. ASP.NET features such as pipeline optimization and process configuration aid you in addressing the varying requirements as your project scales from one stage to another.  

2. An efficient web server

The prime reason behind the increased use of ASP.NET is its excellent web server efficiency. Backed by a brilliant web server, ASP.NET enables you to deal with different web development scenarios in addition to offering you the flexibility of monitoring web pages, modules and specific components. To sum it up, with ASP.NET, you need not stress about the speed of the web server because the framework handles the dedicated memory which is required for building web applications and further protecting the application from a wide array of irregularities and security infringements that might occur during the development process. 

3. Commendable speed

Speed is something that can render more power and authority to the web developers. If you are going with ASP.NET, you can expect quick and prompt arrangement of controls and facilities. Equipped with tables, easy-to-handle grids and wizards, ASP.NET offer you a suite of navigation, allowing you to execute web development projects smoothly. Eliminating the need for configuring a web server, ASP.NET permits you to get started with the app coding process rightaway.

Since ASP.NET runs on its own web server, you need not worry about configuring a new server on your system. The framework automatically spins a web server for your use. This is indeed a feature unavailable in a variety of other web app programming frameworks.

4. Lesser coding

Unlike a wide collection of web app development frameworks, ASP.NET comes with brilliant functional capabilities, thereby eliminating the need for any lengthy and complex coding. Features such as:WYSIWYG editing, drag-and-drop server controls and multi-lingual support make ASP.NET a framework worth working with. These features make ASP.NET a viable option for both professionals as well as the beginners who’ve just started using the framework for developing out-of-the-box web applications.

5. Trustworthy and consistent

With authentication and data validation serving as two strong assets of ASP.NET, it won’t be wrong to call it as one of the most reliable web development systems. Rich in streamlined components, ASP.NET allows a web program to automatically detect and recover from bugs, followed by acting in the right way. Issues such as crash protection, dead locks and memory leaks are being addressed well by ASP.NET.

As a web developer, you’ll no longer have to worry about system exceptions and all the scrubbing incoming data during web app development. ASP.NET is already designed to handle all this and much more for you. All you need to do is delve into some easy coding and you’re done with building a perfect web solution.

Wrapping it all up

The aforementioned pointers are just the tip of an iceberg. There’s a lot more to explore with the ASP.NET programming framework. If you’re looking forward to develop rich and expensive web applications then ASP.NET is the platform you can choose without giving a second thought. Looking at the ever-growing demands of today’s clients, ASP.NET is the tool that will help you meeting every type of web app development requirement.

Create Dynamic Menu in ASP.NET MVC – A Complete How to Guide


A menu plays a significant role in lending an amazing UX by making an application easily navigable. It can be used to make accessibility to a particular section a breeze.If you want to ensure a surefire application, it is essential that elements of your application must be accessed with ease. It must appear intuitive and intriguing, so that users can execute them with a flair. You may create multiple modules within a project and depending upon the user’s permissions, an appropriate menu can be implemented dynamically via ASP.NET.

ASP.NET is an open source server side framework that augments web app development with great efficiency and precision. It is the core of the popular Content Management Systems (CRM), eCommerce, and so forth that deliver utile features.

Here is a comprehensive guide that offers a complete tutorial for creating a user-friendly dynamic menu via ASP.NET MVC. The process is extremely simple with only 5 easy steps at a glance.

Let’s distill the process and explore how dynamic menus can be created efficiently.

Create Dynamic Menu in ASP.NET MVC

Step 1: Create a database table

To create dynamic menus in ASP.NET MVC, the very first step is to generate a database table that can hold all the menu items in a designed hierarchy (if any). The database table can be created with a simple query as mentioned below.

Create Table Menus(ID int Primary Key Identity(1,1), ParentID int foreign key References Menus(ID), Title varchar(50), Description varchar(250))

This query will create a table Menus that will hold four values. These values are:

ID: is the primary key and auto generated
Parent ID: is the foreign key
Title: Name of the field
Description: is the information that you want to display when a user hovers over the menu.

With this, a desired table will be created in the database.

Step 2: Insert values into the table

A simple insert query can be used for adding the data into the table. Now, there are two possibilities, that is, your menu may possess multiple parent items that further possess child items or there may be parent items only. So, you must insert the values as per your app requirements.

Query to insert values into the table Menus.

Insert Into Menus(null, ‘Item One’, ‘Desc’) // First Parent Item
Insert Into Menus(null, ‘Item Two, ‘Desc’) // Second Parent Item
Insert Into Menus(null, ‘Item Three’, ‘Desc’) // Third Parent Item
 
Insert Into Menus(1, ‘Item Sub One’, ‘Desc’) // Child of First Parent Item
Insert Into Menus(2, ‘Item Sub Two’, ‘Desc’) // Child of Second Parent Item
Insert Into Menus(3 ‘Item Sub Three’, ‘Desc’) // Child of Third Parent Item

By implementing the above mentioned queries, your Menus table will contain three items in the Menu and each item will further have a child item.

Step 3: Fetch the data from the table

Now, the next step is to fetch the menu items from the table Menus that was created in the step 1, and return a list of all the items.

For this, a GetMenus() function is created in MyMenu class. In this function, there is a loop that will help fetch the items of the Menu and return them via a list. The lines of code for the same is as follows.

Code Snippet for model:

public static class MyMenu
{
   /// <summary>
   /// Get List of All Menu Items from Database
   /// </summary>      
   /// <returns>Returns List<Menus> object</returns>
   public static List<Menus> GetMenus()
   {
       using(var context = new ProjectEntities())
       {
            return context.Menu.ToList();
        }
    }
}

Step 4: Display the created menu on the screen

Now, when the Menu items has been fetched from the database, it is the time to represent it in the view.

Code Snippet for View:

@{
    List<Menus> myMenu = MyMenu.GetMenus();
    var plist = myMenu.Where(m => m.ParentID == null).ToList(); // This will list main menu items on which we’ll apply loop to display them.
    if (plist != null && plist.Count > 0)
    {
        <ul class=”nav”>
        @foreach (var pitem in plist)
        {
            <li>
                <a href=”{URL-Required} title=”@Description”>@pitem.Title</a>
                @{
                    var clist = myMenu.Where(m => m.ParentID == pitem.ID).ToList();
                    if (clist != null && clist.Count > 0)
                    {
                        <ul>
                            @foreach (var citem in clist)
                            {
    <li><a href=”{URL-Required}”title=”@Description”>@citem.Title</a></li>
                            }
                        </ul>
                    }
                }
            </li>
        }
        </ul>
    }
}

Here, ui and li HTML tags are used in the loop. This will help display the created menu in the view. Now, move to the next step.

Step 5: Beautify the menu to make it appear captivating

To ensure an enticing and easily readable menu, it is essential to make it appear visually appealing and intriguing. You may use the CSS appropriately to enhance the look and feel of the menu in a desired fashion. Here, I have incorporated the following chunk of code in the CSS file to boost the navigation ease and ensure an attractive Menu.

Code Snippet CSS:

ul, ol, li {list-style: outside none none;}
.nav {float: left;padding: 0;background-color: #5eab1f;}
.nav li {display: inline-block;position: relative;vertical-align: middle;}
.nav li:hover, .nav li.active {background-color: #4c9312;}
.nav li a {color: #fff;float: left;font-size: 15px;padding: 16px 14px; text-decoration: none;}
.nav li ul {background-color: #fff;border-radius: 0 0 5px 5px;box-shadow: 0 2px 3px #000;display: none;min-width: 200px;padding: 20px 0;position: absolute;top: 48px;z-index: 9999;}
.nav li ul:before {border-bottom: 8px solid #fff;border-left: 8px solid transparent;border-right: 8px solid transparent;content: “”;left: 28%;position: absolute;top: -8px;}
.nav ul li {float: left;width: 100%;}
.nav ul li a {color: #333;float: left;font-size: 15px;padding: 10px 5%;width: 90%;}
.nav li:hover, .nav li.active {background-color: #4c9312;}

This CSS has been created considering a few requirements, you may develop it in a desired fashion to bring substantial changes in the visual appearance. Therefore, you may streamline the CSS as per your UX and design needs.

Wrapping Up

By following this absolute guide, you can efficiently create beautiful dynamic menus via the ASP.NET MVC. It is advisable to thoroughly go through each step and design desirable menu while ensuring utmost navigation ease.